Insert the SD card in the router and turn it on. Your router should now have internet connectivity.
Security
Add your SSH public key to the router.
your@computer:~#
Bash
Copy
ssh openwrt "tee -a /etc/dropbear/authorized_keys" < ~/.ssh/id_ed25519_openwrt.pub
Warning: Permanently added 'openwrt' (ED25519) to the list of known hosts.
ssh-ed25519 AAAAC3NzaC1lZDI1NTE3AAAAINNOW3ZTKXDrzFjktCvLdgWh1XMMx0FU/ue2byYEkLPR root@openwrt
ssh openwrt
Harden security by setting a root password and disabling password authentication.
root@openwrt:~#
Bash
Copy
passwd
Changing password for root
New password:
Bad password: too short
Retype password:
passwd: password for root changed by root
uci set dropbear.@dropbear[0].PasswordAuth='0'
uci set dropbear.@dropbear[0].RootPasswordAuth='0'
uci commit dropbear
service dropbear restart
Wireless
Open LuCi by navigating to https://192.168.1.1 and login with your newly set password.
Under Network > Wireless make sure to configure both access points with the appropriate operating channel, transmit power and country code.
SQM
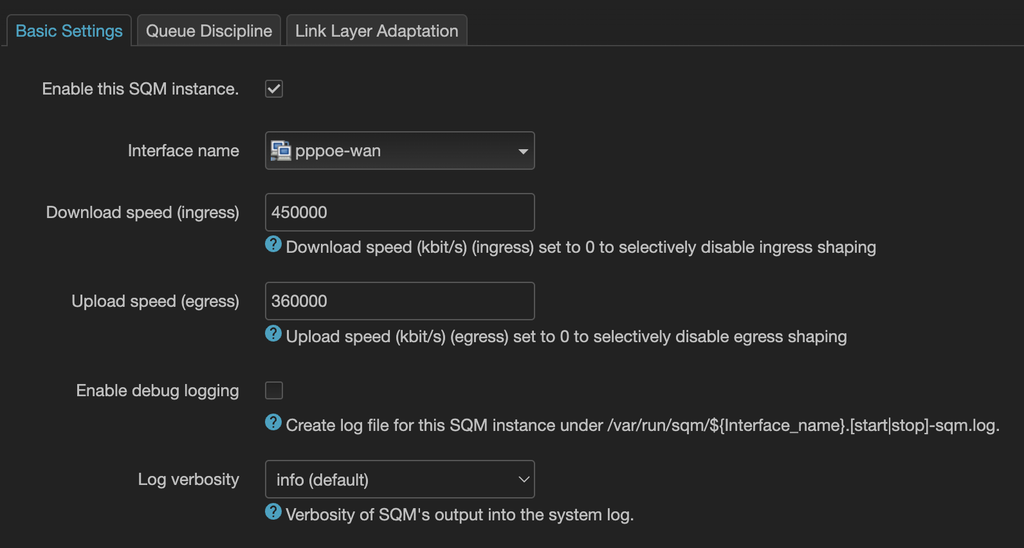
Now test your router bufferbloat using Waveform. If you’re not getting an A+ grade, try lowering the download and upload values progressively until you get rid of bufferbloat.
Ad blocking
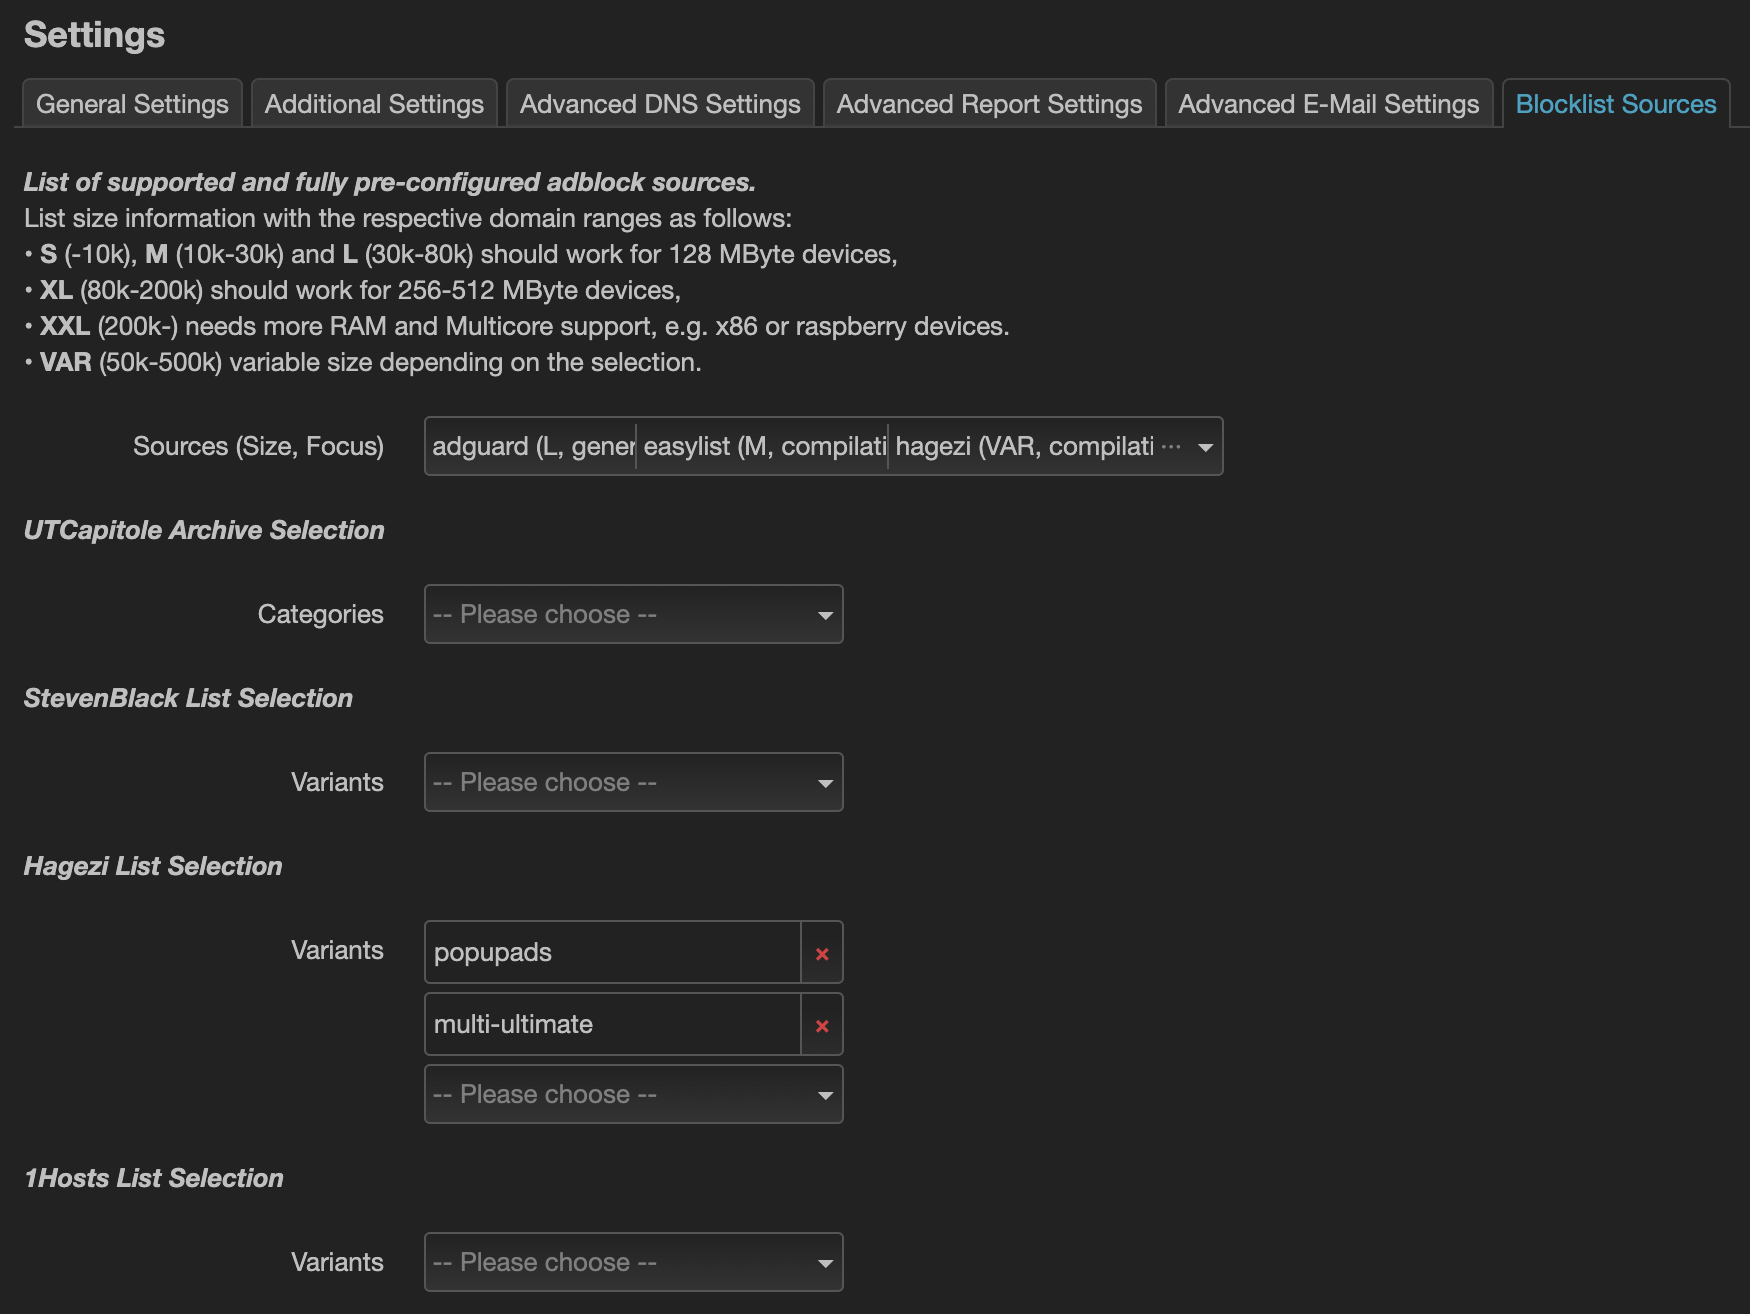
Ad blocking is enabled by default, but with no configured blocklist sources. Open LuCi and navigate to Services > Adblock. Under Settings click the Blocklist Sources tab and pick the sources that better fit your needs. Click Save & Apply and after a couple of seconds the blocklist sources should be downloaded and Blocked Domains should update.
Almost done
If you’re satisfied with your OpenWrt configuration, make sure to download a backup. Open LuCi and navigate to System > Backup / Flash Firmware. Under Backup click Generate archive.
Don’t forget to destroy your Ubuntu instance. Move on to the  6. Flash eMMC section.
 6. Flash eMMC section.


